How to Connect Printer to Cricut Design Space: Full Guide
Greetings to all my lovely readers; today, I will discuss how to connect printer to Cricut Design Space. Since kindergarten, I have been very fond of creating new things from scratch, and the hobby soon turned into a passion. As time passed, I bought myself a professional Cricut machine and started making several projects with it. It's been over five years, and I love using Cricut products.
Whenever I start designing a new
craft, the prominent tool that plays a vital role is Cricut Design Space. It's
an easy-to-learn app with an ever-growing library of millions of images,
thousands of fonts, and hundreds of custom-made projects available. I was also
able to get the Cricut app for my system for free, which supports all Cricut
machines. This guide provides details on installing Cricut Design Space on
mobile devices compatible with printers and connecting it to the printer.
How to
Download Cricut Design Space on Mobile Devices?
The most important thing you
need to know before jumping into how to
connect printer to Cricut Design Space is installing it on mobile devices.
After fulfilling the basic system requirements, you can quickly get the Cricut
Design app on your Android or iOS devices. Get to know about the installation
process by referring to the below-shared details:
For
iOS
To get the Cricut software on an
iOS device, you are supposed to follow the steps given below:
- Commence the
app installation process by opening the App Store installed on your device.
- After
opening it, type Cricut Design
Space inside the Search section, and the app will appear inside the
white square.
- Now, click
the Get button and double-click
the power button or enter your iTunes password (If asked) to
confirm the installation.
- When the
installation is finished, open the Cricut
Design Space app and select the Machine
Setup or Sign In option.

- Congrats,
you can now make your favorite designs anytime on the Design Space canvas.
For
Android
At the same time, the Cricut
Design app runs effortlessly on Android devices. To install Cricut Design Space
on Android mobile devices, follow the instructions shared below:
- Inaugurate
the installation process by visiting the Google Play Store.
- Next, open
the app, type Cricut Design Space, and
press the Search box.
- Now, tap the
Install option and let the app
install on your device.

- After the
installation is finished, you will see the Cricut Design app next to other
apps.
- Also, open
the app and click Machine Setup or
Sign In option.

With the installation of the app
on your smartphone, you can make customized designs on the canvas at any time
of the day. Also, you are just a few steps away from coming across with the
details about how to connect printer to
Cricut Design Space.
Which
Printers Are Compatible With Cricut App?
Nowadays, printers have become a
basic need in every individual's life. They are used to completing school
projects or office work on an everyday basis. Referring to Cricut Design Space,
this designing software runs effortlessly with all kinds of printers. Whether
you want a Black & White or colored design printout, the Cricut app will
give it to you within a few minutes. Some of the famous printer series that are
compatible with the Cricut Design app are:
- Canon
PIXMA series
- HP
Deskjet series
- Brother
All-In-One series
- Samsung
Laser printer series
- Epson
All-In-One series
How to
Connect Printer to Cricut Design Space?
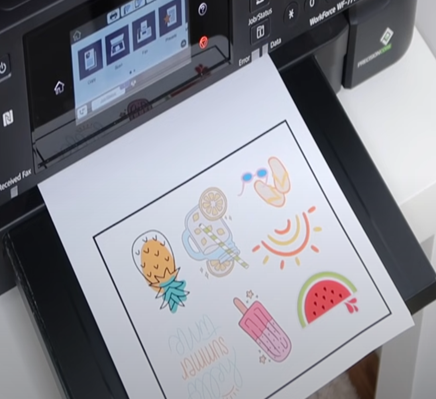
The Cricut Design app is widely known for designing Print
Then Cut stickers. The Print Then Cut will allow you to create the design on
the Cricut software, print it on a home printer, and load the printout into the
cutting machine. The cut-die machine automatically scans the printed, cut
markings and then cuts the designs without scissors. If you are a quick learner
and eager to connect the printer to Cricut Design Space, then refer to the
below steps:
- Initiate the
method by signing into Cricut Design Space and tick the New Project option.
- After that,
select the Images tool and
choose Print Then Cut under the
Operation Type section.

- The
necessary modifications must be made, and the image must be aligned in the
correct place.
- At this
time, select the materials, and a printer setup window will appear on your
screen.
- Select your
printer model and total copies, turn on the toggle to Add Bleed, and Use
System Dialog.
- Next, tick
the Print box given inside the
green box.

- At this
point, change the feed from and
media type and hit the Print button
again.
- Moving
forward, insert the A4 size sheet into the printer and turn it on.

- After a few
minutes, turn off the printer, take out the printer, and get started with
the cutting process.
Referring to the earlier method,
it will become a child's play for you to connect a printer with the Cricut app.
Frequently
Asked Questions
Question:
Which Materials Are Compatible With Cricut Print Then Cut Feature?
Answer: If you are
going to use the Cricut Print Then Cut feature to make custom-made crafts, you
need to use reflective materials, such as metallic and glossy finishes. Some
cutting machines, such as Cricut Explore Air 2 or older models, print on
non-reflective white materials. Plus, the Cricut Venture, Cricut Joy, and other
models only print on non-reflective materials.
Question:
Can I Connect My Cricut Machine to Printer?
Answer: Yes, you
can easily connect your Cricut machine to your printer. However, certain
printers aren't compatible with cutting machines due to their thickness, paper
type, and other factors. So, you need to ensure that your printer is compatible
with your Cricut cutting machine.
Question:
How Can I Install Cricut App on My Windows?
Answer: Have a
look at the below steps to install the Cricut software on your Windows:
- Begin
the process by navigating to Cricut Design Space's official website.
- After
that, tick Download, and the
file will begin to download.
- Open
the installed app, sign in, and create your account.
Source URL: - How to connect printer to cricut design space
Visit - Cricut Explore air 2 software


Comments
Post a Comment